Thursday, June 12, 2014

Understanding Disney Addiction for my Non-Disney Friends


As an adult Disney fan, I’ve had to explain my addiction to friends and co-workers time and time again.  This is a difficult task.  How do you explain as a person over the age of (cough, cough) that you love going to Disney World as much as your kids, if not more?   And this is especially hard when you run into people that have had less then fun Disney experiences.  I’ve heard all the Disney woes.  “I hate the crowds!”  “I hate waiting in line.”  “That place is just too crazy.”  So, how do you explain Disney to these people?

On our trip a week ago, I took some time to really think about why I love visiting with The Mouse.  I love that when you step inside a park, the outside world melts away.  There is no work to think about, no housecleaning, and no homework or carpool.  The everyday world disappears and you are in Disney World.  But, it is more than that, much more than that.

Sitting in Tomorrowland, it came to me.  What I enjoy about Disney is not completely disappearing from my life, but seeing all the life going on around me.  It’s the memories being made around me as I walk down Main Street or step onto a ride.  The ones that make me stop, smile and appreciate that moment in time.  And last week I wrote down a few to share.

There was the 3 year old girl in the bathroom outside Crystal Palace singing “Let It Go” at the top of her lungs as she washed her hands and waited for her mom.  I think everyone in or out of a stall at that moment couldn’t help but smile. And yes, in the bathroom.

There was the couple in their 60’s on the Tea Cups.   The husband was laughing away as he spun them in circles. The wife had a sly smile on her face and a playful look.  They spent the entire ride staring at each other, laughing, flirting and just being young again.

My favorite moment, though, had to be a group of teenagers riding Dinosaur with their grandpa.  They were excitedly telling him about the ride and nudging him along.  He playfully joked with a Cast Member “Is it too late to leave” while giving a wink.  The teenagers roared, “Oh no grandpa!  You have to go!”  He laughed and got on board.  The entire ride the teens called out to their grandpa to look here and look there and “here we go grandpa!”  They were more excited to be riding with him than anything else.

Those moments are why I love Disney.  Seeing a young child’s imagination come to life while they sing at the top of their lungs.   Watching grown adults become kids again and experience true love.  And seeing generations, old and young, sharing time together and making memories.  So next time someone asks you to explain your Disney addiction, I hope this will help.  And I challenge you next time you are at Disney to take a few moments and look around.  See the memories being made, feel the excitement in the air, and smile.   That’s what it is all about.

Sunday, June 8, 2014

The Mane Event - Harambe Nights at Animal Kingdom


For a month, we kept a secret from my Lion King FANATIC daughter.  And when I say FANATIC, I mean FANATIC!  She can quote lines from all three Lion King movies.  She can tell you the names of Simba and Nala’s two children and the real name of Scar.  If there was a Lion King Trivia competition, this girl would win hands down!   So what was the big secret?  We had tickets to Harambe Nights, the after-hours celebration at Animal Kingdom marking the 20th anniversary of the Lion King.

We arrived at the park around 5:15pm. Disney Daughter (DD) thought we were there to buy something for her birthday.  As we walked in, cast members held signs announcing the entrance to Harambe Nights.  Our acting skills were spot on.  We asked a cast member what the event was all about .  “Hmmm, wish we had tickets,” hubby said.   Wasn’t until they put the special band on DD’s wrist and gave us our event booklet that she realized we were going and that was her present. 

Harambe Nights started at 7pm, so we had a little time on our hands and headed straight to Expedition Everest.  A 5-minute wait, WHAT?!?!  Yes, we hopped on it twice before meandering over to Africa around 6:10.  Guests gathered around the Dawa bar waiting for the night’s festivities to begin.  And, yes, the early bird catches the worm - or in this case, early entry.  Around 6:40, guests were led into the area in front of the newly constructed home of the Festival of the Lion King.

We were greeted by the music of an Afro-Pop band as the MC welcomed us to the evening’s festivities. Cocktail tables topped with African-themed décor filled the area along with food and beverage stations serving drinks and appetizers.  It was a party atmosphere and excitement filled the air.

2014-06-07 18.42.18
The Spicy Durban Chicken, Pickled Fennel Paneer Cheese and Moroccan Beef Kefta were delicious and seemed authentic.  However, the big hit was the Safari Cheeseburger Roll.  Hubby had 9. No joke, 9.  The beverage stands offered a variety of beer, wine, soda, water, and Jungle Juice.  On its own, the Jungle Juice was non-alcoholic and had a mango and citrus flavor.  And on request, bartenders would add a splash of rum. Yum!

Our MC encouraged guests to talk to the Cultural Representatives stationed throughout the venue.  We spoke with a lovely young lady from South Africa.  She said that people usually think Africa looks like the Pride Lands in the Lion King and are surprised to learn that she is from a big city.  Another Cultural Representative taught us how to play Mancala, an African game.


2014-06-07 18.51.01
Adding to the atmosphere were painters brushing neon tribal prints onto the faces of willing guests. A splash of bright orange and green markings, and DD was ready to go!


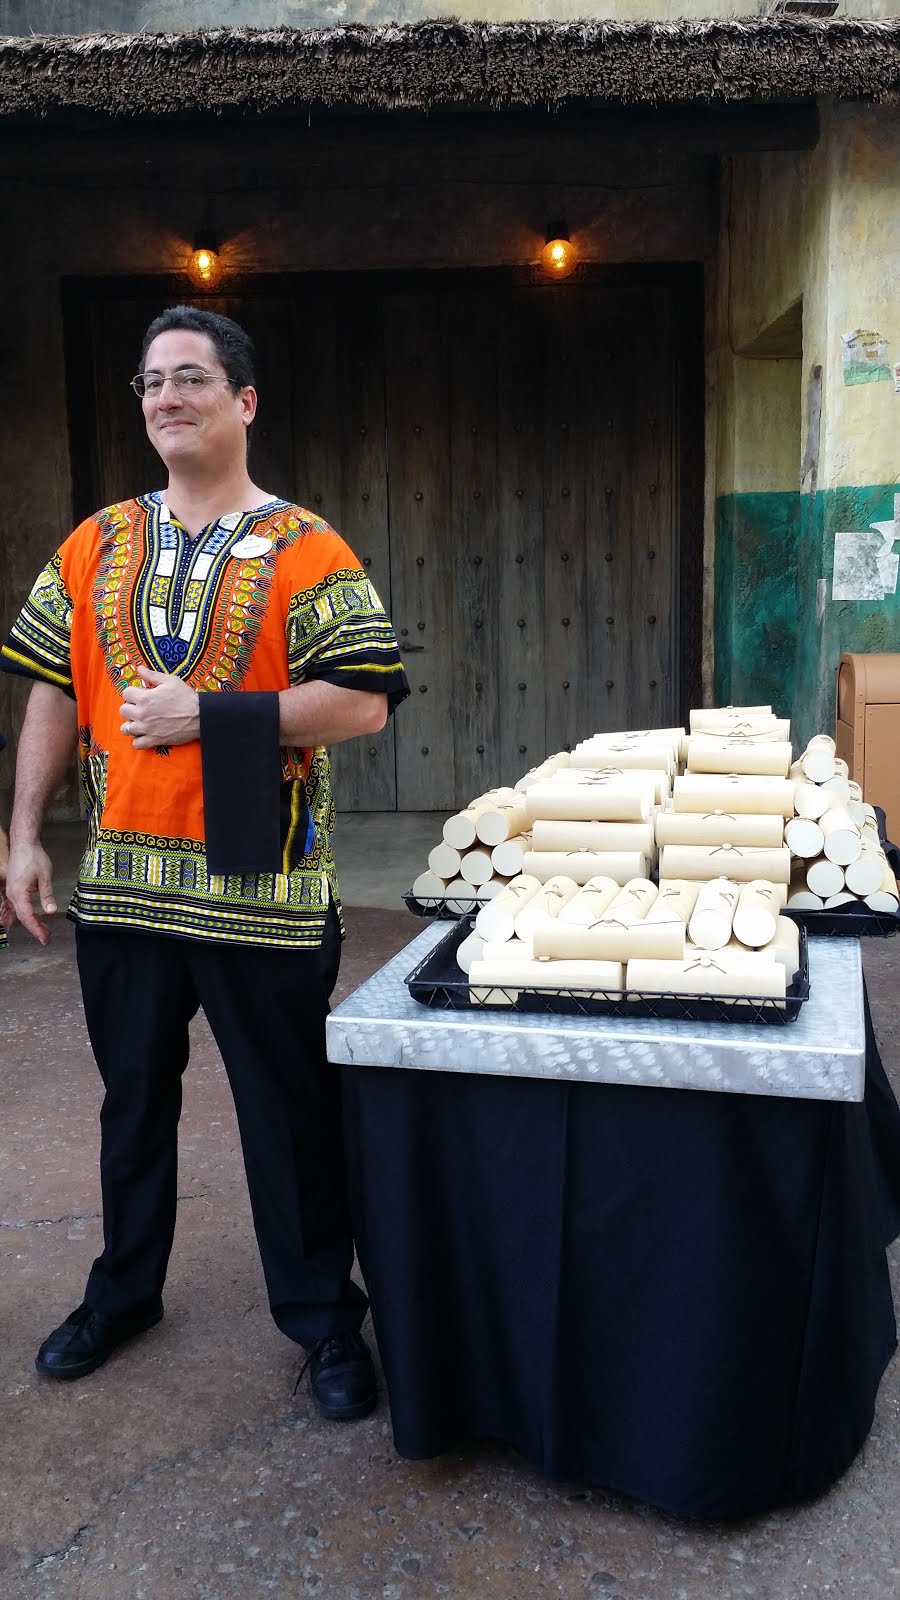
We had plenty of time to mingle, eat, and drink before we were asked to enter the show.  Entrances were divided into the four animals we recognized from the Festival of the Lion King.  We were Giraffes and headed to our designated area where greeters handed out wooden tubes containing “Lion Chow”.  


2014-06-07 19.18.08


DD and DS (Disney Son) weren’t too big on the Lion Chow spices.  Hubby enjoyed the candied pecans while I “Lion Chowed down” on the Sea Salted Toasted Pretzel Chips.  And yes, we kept the wood container as a souvenir.

The VIP ticket holders sat center stage on the floor.  Our Giraffe area was to the side and still had a fantastic view.   The band was located on the left, the choir on the right, and in front was an empty space for performers.  The guest narrator and host were elevated on Pride Rock at the center of the stage while large TV screens flanked each side.   

The show took clips from the beloved Lion King movie and intertwined them with live music, live performance, choir accompaniment and narration.  We were fortunate to have Viola Davis, star of the movie The Help, as our Guest Narrator.  She began with a note about her own connection with the Lion King 20 years ago, how she cried when Mufasa died and felt as though she had lost a member of her own family.  I saw my DD connect with her, a kindred spirit.

Ms. Davis’ performance was passionate and included a cute “Simba” voice for parts as well as a terrifying Scar.  Several talented Disney artists emerged from the choir to sing beautiful solo performances including “He Lives In You”, a song my DD identified as not from the 1st movie, but from the sequel and Broadway musical. The choreography was beautiful and the performances fantastic.  Dancers played the role of jungle animals, cackling hyenas, the beloved Rafiki, and our jungle lovebirds (or lions that is) Simba and Nala.  The show ended with a well-deserved standing ovation.

After the performance, dinner was served and the Street Party began.  We were directed to the central Africa area of Animal Kingdom.  The celebration stretched from the Discovery Island Bridge to the Kilimanjaro Safari exit.  Food stations filled up quickly both outside and inside the Tusker House.  We had to wait a bit in line but found an impressive variety and amount of food once we reached the buffet.   There was something to appeal to everyone in our party.   
2014-06-07 21.15.15

I enjoyed the Watercress, Melon, Feta and Berry Balsamic Onion Salad as well as the Fork Tender BBQ Pork.  Oh, and of course, the Papadum Bread and Vegetable Samosas were delish.  DS ate 2 helpings of the Seared Lamb Chops with Tamarind Pomegranate Sauce.  And for DD, Macaroni and Cheese was the highlight of her dinner.

The desserts were quite interesting.  Pineapple pieces covered in coconut  were hubby's favorite.  Not as big a hit was the Rice Pudding with Dried Fruit Compote and Pistachio Gremolata.  It required several other foods and drinks to clean the taste off of the palate.   The Chai Cream with Zebra Stripes reminded me of Egg Nog with a touch of Nutmeg.   Just when we thought we were finished, they brought out the Mickey Bar and other ice cream treats.  A perfect end to a delicious meal.  Did I mention that the St. George and Tusker Lager were refreshing on the hot and humid night?

There was dancing in the streets with the Afro-pop band and various dancers encouraging party goers to get on the floor and shake it.  Mickey and Minnie in African garb floated around the party as well as Timon and Rafiki.  The Africa shops were open and offered event specific merchandise and limited edition Lion King Collectables.  Costa Alavezos, a Senior Character Artist for Disney was on hand signing Lion King Prints.  We purchased a sketch of Simba, Timon and Pumba that he personalized for our DD.

By 10pm we were partied out, had full bellies, and huge smiles on our faces.  As we left the park, the Tree of Life was aglow with twinkling lights, like fireflies dancing in the night.  A parade of animals and cast members bid us farewell.  It was a night to remember.  Was it a huge price tag?  Yes.  But we felt it was worth it.  The performance was a top notch production, the type you would expect from Disney.  They spared no expense on the unlimited food and beverages.  And the décor and cast members led you into a magical world of fun.  When asked to sum up the night in two words, everyone agreed… Hakuna Matata!


Monday, September 17, 2012

Rockin' Dry Erase Desk Frame

My latest craft project came out of necessity for keeping my sanity.  I am a working mom of two middle school kids.  Yes, it freaks me out to think they are in middle school.  And I am trying to be the mom that helps them stand on their own two feet and learn that I will not always be there to remind them of everything.  Heck, at the pace my memory is going, I'm lucky to remind myself of the things I have to do these days!

So when I came  across this idea on Pinterest, I was in love.  What a quick and easy way to make a "To Do" dry erase board each of them can keep on their desk!  Brilliant!   I would love to put the link for the original site, but I cannot find it.  So kuddos to whoever posted the inspiration for this originally.  

  
I found a simple black frame at the $1 store (glass center).  The rock n' roll ribbon was on sale at Michael's for $1.50.  The other ribbon I had in my craft supply, gotta love being able to use something already on hand!  And the notebook paper I stole out of my daughter's backpack.  Shhhh, don't tell!

After cutting and inserting the notebook paper into the frame, I attached the checker ribbon around the top and bottom of the frame with a glue gun.  Next came the rock n' roll ribbon which I tied in a bow, cut off the excess and glued to the corner with the hot glue gun.  Voila, that really was it!  $2.50 and now my daughter has a fashionable dry erase "To Do" board.  Now the trick will be getting her to use it!

Sunday, September 16, 2012

Pinterest Party - Burlap Door Decor

I have no idea what got into me this weekend.  I was a crafty girl.  Maybe it was that I kicked it off with a Pinterest party and the crafting just never stopped.  What is a Pinterest Party?  I am glad you asked...

A few of my friends and I decided to try something new for our GNO on Friday.  We brought over an appetizer, a beverage of choice and a craft we had found on Pinterest.  It was the best GNO ever!  (Although, I do have this one word of caution.  Make sure the crafting takes place before too many beverages are consumed.  Otherwise the results may vary and be rather humorous the next morning.  But I digress.)  

We created a Facebook Event for our party so we could share some ideas before hand.  A few of my friends mentioned creating burlap door decor.   The funny thing is that I had just seen this at the Orthodontist's office for the first time that exact day (shaped like a tooth of course).   I searched Pinterest and found that I was obviously missing out on one of the latest decor trends.  These things are everywhere!

I jumped on the burlap bandwagon for our Pinterest party and decided to make one for my sister-in-law for her birthday.  She is a full tilt Georgia fan, and I had found the perfect Pinterest inspiration.  Here is my creation....


I learned a few things to do and not to do with this project. First of all, trace the shape you want but do not cut it out until after you have painted it.  I cut mine out before I painted and it did make it more difficult than some of my friends who did not.   Second, don't feel you have to use brown burlap.  I found a great red burlap that cut down the amount of painting I had to do.

After selecting my shape, I used white paint to do the trim first.  This doesn't need to be perfect.  As you can tell, the burlap will bunch a bit once it is stuffed, so no one will notice slight imperfections.   Plus it is those imperfections that make it look homemade.  I went about 2 inches in with the white acrylic paint all the way around.  Then I came in with the black paint and traced my G about 1/2 an inch from the border.  I kept adding black until I had a width I liked and then filled it in.

Now here is where the Crispin Apple Cider came in.  I did have a black spot that I got "outside" of the lines a bit.  But it worked out perfectly because the next day I added a dark red shadow to cover it up and then some gray shading into the G.  Mistakes can sometimes be inspiration!

Once I completed the painting and it had dried, I took a matching piece of burlap (not painted) for the back and began to glue the edge of the two together.  The glue gun worked great for sealing around the edge of the two pieces.  I left about a 6 inch gap.  After the glue dried, I stuffed it with batting then glued up the last little bit.

For the final touch, I decided to make my hanger out of ribbon.  Most of the samples I saw had wire hangers, but I love the look of ribbon.  Using two different size ribbons, I glued them on top of each other to give a layered look.  Then I used a stapler, yes a stapler, to staple the ribbons onto to the burlap.  To hide the staples, I hot glued the matching bows on top.  There ya have it!  Ready to be placed on the front door.

I have a feeling this is going to be the beginning of a burlap addiction.  And we have already agreed that the Pinterest Party will now be a monthly event.  Friends, food, wine and crafting.... life just doesn't get any better.


Saturday, August 18, 2012

Back to School - Pencil Centerpieces

Here we are at the beginning of the school year and life is crazy!  And I know it is even crazier for my teacher husband and friends... organizing their classrooms, starting lessons plans, and doing all those little things that make the first week back so amazing for our kids.  So, when our PTSA started planning the back to school teacher Breakfast catered by Waffle House, I quickly offered to take on the challenge of centerpieces.  I know centerpieces do not sound that vitally important, but it was just one small way to make the teachers feel welcome and show my appreciation.

I often think that Middle School teachers kind of get the raw end of the deal.  We are so quick to do fun and cutesy things for teachers when our kids are little, but once they get into Middle School we kind of forget to say thanks.  And those are teacher working with our kids during the largest growth spurt of their life (except for 0-3 years old).  That's right, our kids grow and develop more in Middle School than any other time in their life except for when they are first born.  Sorry, I got off on a tangent, but needless to say, I was glad to have a chance to say thanks.

I scoured Pinterest for cute ideas, but so many of them were a little young for the Middle School theme.  Then I came across this website by Lisa Renee that had several cute ideas... http://nf1andpre-kwhisper.blogspot.com/2010_05_07_archive.html.  The pencil center piece with flowers was a winner!

And here is my version and how it was made:


I purchased canning jars at Target because I could get 12 of them for under $10.  The flowers came in bunches from the dollar store along with the Styrofoam balls.  The ribbon was laying around from various craft projects.  And pencils, sticky tape and rubber bands rounded out the supply list 

Luckily I have this amazing friend named Grace that also loves to craft and share her craft room with me.  I want to live in her craft room!  So I brought over all the supplies and we went to work.  Thank you Grace!  

The sticky tape is the type used for card making, strong stuff (stronger than double sided tape).  I decided not to use the glue gun in case the pencils could be used later (my husband says teachers are ALWAYS in need of more pencils).  We put three bands of sticky tape, one around at the top, the middle and the bottom of the jar. Then a few more strands were placed going up and down on raised parts of the jar.  

After securing the pencils one by one beside each other, we used a rubber band to secure then from the outside, a little below the middle of the jar.  In addition to being decorative, the ribbon helped hide the rubber band, clever and handy.  Since I am not the best at tying bows, a few small flowers were used in the middle secured by more sticky tape.  Love that stuff!

Lastly, the Styrofoam balls were placed in the middle, and we began to arrange the flowers.  I put a few leaves in some of the arrangements for an added touch.  Unfortunately I forgot to take a picture!  To complete the arrangement, we sat each flower holder on a book bought at the dollar section at Target and put an apple on the side.  

The centerpieces were a big hit.  We decided to include them in a drawing and heard squeals of delight when each teacher won.  Several teachers even came up and asked for the instructions or if I'd seen it on Pinterest.  My reply being, "of course!"  So thank you to all those that inspire us on Pinterest because without you, my creations would never be!

In the end I was so busy trying to meet and greet teachers arriving that I forgot to take a final picture.  But I have called in reinforcements, knowing others did, and hope to have one up soon.  In the mean time... remember that crafting is even more fun when you get to give the end result away to someone who really deserves and appreciates it.  And few people I know deserve it more than our teachers!    

Sunday, April 15, 2012

Count Down to Disney

We have Disney issues.  Okay, to say "issues" is mild, we are addicted to Disney.  My favorite trips are when we are able to share the magic with friends.  To see Disney through fresh eyes is like experiencing our first visit all over again.

Over the years we have made several different count down calendars to anticipate the big day when we leave for the happiest place on Earth.  Our first year we made a paper chain and tore off a link every day until there were none.  A year or two later we made a calendar on the computer with pictures of different characters and crossed off a character each day.   

This year, we are going with two other families.  One family is surprising their crew the day before, so no count down calendar needed.  But the other family has the most precious little 4 year old that apparently squealed in delight when he found out they were going.  Crafting is so much more fun when you get to share it with someone, so we made two calendars this year, one for us and one to share.

My love of Pinterest led me to this adorable count down idea.  http://www.mamaofalltrades.com/2012/03/disney-vacation-countdown-shes-crafty.html
Here is my version with a few things added to make it all our own.

PLEASE VISIT my new Blog at www.mousEducation.com for more Disney ideas, crafts and learning.  My new Blog is dedicated to learning about Disney but also using Disney as an Educational tool.  Your children hopefully won't even realize you are using the "E" word and will think it is all just Disney fun!


I found the chalk board flower used as the base at Target in the $1 section (discounted to $.50!).  The clothes pins were also a Target buy.  Ribbons, the Disney in the center, Mickey ears and bow were all from Michaels in the scrapbooking section.  For the numbers, I printed them off on the computer using a font called "Minnie".   Punches from Stampin Up made the clips an easy craft using a tape runner and then glue dots to attach them to the clothes pins.  

So, here was our added little touch.  As the days go by, you turn the pins over to count down.  With a little help from my 10 year old Disney fan, we added some fun trivia and activities to the back that were age appropriate for a 4 year old.  Here is a sample.


Other activities include (these were geared toward a boy):
Jump around like Tigger
Sing a Disney song
Dance to the Mickey Mouse song
Which character is mommy like? (same with daddy)
Act like you are on a roller coaster
Read a Disney book
Laugh like Goofy
Draw Mickey ears
What does Pooh like to eat?
Hide Eeyore's tail and look for it
Who lives in Radiator Springs?
Race in a circle Cars
What kind of animal is Dumbo?
Act like your favorite safari animal
Who is Mickey's dog?
Pack a favorite toy for the car
Act like your favorite character
Make fish faces like Nemo
Who is the meanest Disney villain?
Watch a Disney movie

The craft was so fun to make, but I think coming up with activities was the best part of all.  So, let the countdown begin!


Sunday, April 8, 2012

Water Water Everywhere - Girl Scout Water Bottles

My children must think that I am Wonder Woman, capable of carrying large quantities of items when we are walking around on vacation.  Totting the items they get tired of holding like some sort of pack mule.  "Mom, can you carry my lip balm?   Mom, can you carry my water bottle?  Mom can you carry the $2 I have left from shopping?"   I pictured what it would be like with 16 Girl Scouts in Savannah, and quickly decided I needed a plan.   From that plan hatched my next craft project.

I had seen a few water bottle holders on Pinterest made from jeans or various pieces of clothing.  But I needed something that could hold not just a water bottle but also small items each scout would need while wandering through Savannah.   I wanted it to be a fun keepsake the girls could pull out years from now and show their children as they tell stories of the trip.  Tall order, I know!   

Brainstorming with my husband, we came up with a similar design to those I had seen but with a pocket and made from some fantastic Girl Scout fabric I found on eBay.  The result is what follows.... keep in mind that the last time I sewed anything was YEARS ago.  Seamstress I am not.  But I gave it the ole Girl Scout try. 

The fabric is Robert Kaufman and comes in a pink with Try-It's for Brownies and the green with patches you see here for Juniors.  

The side border on the fabric had numbers and "My Troop" along with "Girl Scouts of America".  However, I decided to use only the numbers for my project. 

I found the water bottles at Target. They are BPA free and very reasonably priced for a 4 pack.


The holder required two cuts of fabric.  The larger piece at the bottom of this picture is 12" wide and 9" tall.  This is the water bottle carrier.  The second piece above that is 12" wide and only 6" tall.  This is the pocket that will wrap around the bottom of the carrier.  To the side are the numbers for our troop that I cut out of the border.

I sewed a nice clean edge at the top of each piece (the large and small).  I also sewed on the troop numbers, centering them between the middle of the pocket piece and the right edge.  Do all this while the pieces are separate and PRIOR to layering them on top of each other as you see below.  


Pictured to the left are the two pieces layered on top of one another exactly how they will be sewn.  Take two pieces and fold them directly in half.  The edges of each fabric should line up with the other side.  

Sew about a 1/2 inch in from the edge, down the side, and across the bottom as seen in the picture above to the right.  To give a little more strength, I sewed a zig-zag stitch between my first stitch and the edge.  


Place a bottle inside the carrier, being sure that the bottle is in the center of the inside pocket.   You will notice that there are little "ears" that hang over on each side.  These will be sewn to help create the bottle carrier shape.  Pin both ears while they are on the bottle so you know where to sew.


Sew the ears as shown in the picture to the right.  Again, I did a basic stitch and a zig-zag to provide additional strength.

Turn the bottle holder inside out and you should have something that looks like this.


I purchased some 1" Nylon webbing in Gold on eBay.  Cut a piece to match the exact inside of the carrier and another piece 3 1/2 feet long to serve as the shoulder strap.  Pin the pieces.


To sew the nylon, you need to be sure to have a thicker needle that can handle thinker fabrics.  Also be sure you use all purpose thread.

Sew once about 1/4 inch from the top and again about a 1/4 inch from the bottom around to attach the nylon to the carrier.  You will also want to do a criss-cross stitch shown below to make sure the shoulder strap is securely attached.


And there you have your water bottle carrier as shown below and my little scout with her own.   People raved about our carriers while visiting the Juliette Low house in Savannah and the girls loved to show them off.


As a side note, one of the best things about this project was that I thought of my grandmother every time I sat down to sew.... my grandmother after whom my little scout is named ... my grandmother that was also a scout leader once upon a time and who's leader book I still have to this day and treasure.   This project came to mean so much to me, and I hope it means a lot to these girls.     


Featured Post

Count Down to Disney

We have Disney issues.  Okay, to say "issues" is mild, we are addicted to Disney.  My favorite trips are when we are able to share...